Showing posts with label tags. Show all posts

Friday, February 1, 2013

Scuba Anything Book


I have a delightful, free-spirited friend who commissioned me to make an Anything Book just for her. She had the perfect package for me to use as the cover: a Durex box.
The front cover of Scuba, an Anything Book created from a Durex box.


It's a great choice for an Anything Book because it is just over 5 inches each direction. That means there is room to add in photographs with just a little bit of trimming.

This was a fun project from start to finish. I used the bright blue of the package as inspiration for many of the pages and trims.
I used a mixture of soft and hard materials for the outside trim.


I used 1-inch book rings, so that means there were approximately 50 inserted pages for a total surface of 100 pages. Because of the square size, most of the pages are full size and there is little layering. There are inserted items like a luggage tag, product tags, and a shipping tag.

The Ultimate tag comes from a product and overlays a brochure cut from an IKEA store catalog.


I chose the name Scuba from the name of a color on a blue paint chip inside. Plus, this name gave me the giggles. I suppose that scuba gear is a bit more bulky than a raincoat, but you get the idea.
The name Scuba comes from the color name on this paint chip.


Each two-page spread is color coordinated to create a background for adding treasures. I include an archive quality glue stick with each book, along with an ultra-fine tip permanent marker. The marker is perfect for writing on most of the pages. You can also attach things with clips, staples, or anything else you can imagine.

A vellum page lays over the ruby slippers paper. 
The recipient grew up in Kansas, so the reference to the Wizard of Oz was another bit of humor I added to the contents. The vellum page adds depth and allows her to create something interesting over the ruby slippers paper.

The small white item is a coin envelope that open on the other side. It overlays a menu from a local restaurant.
I inserted several envelopes including an air mail envelope, two coin envelopes, and an upcycled return mail envelope to give her space to tuck away treasures within the pages.

The edges have tabs made from an assortment of papers and ribbons.

Within the pages are 4 journaling sections designed for writing longer entries. These are blank pages designed for writing. Of course, like everything else about the Anything Book, the recipeint can use it any way she wants.

Each Anything Book gets a unique bar code identifier along with a signature and the book name.
The book left with a large rubber band around the edges to hold everything inside and to keep the covers together.

I'm thrilled with how this turned out. And the recipient was equally happy with her Anything Book.

Friday, January 25, 2013

Heartstrings Anything Book

Here's my freshest Anything Book straight from the studio. (see Heartstrings in my Etsy shop)

An Anything Book made from a recycled Mike and Ike freezer pops box.
 Today, I was inspired by the bright colors on this recycled Mike and Ike freezer pops box to make a cheery Anything Book. This book is 7 3/4 inches high by 4 1/4 inches wide, making it the ideal format for journaling. It has four journaling sections for writing longer thoughts and memories, mixed into its 50 items. With each item, you can scrap or journal on each side, giving you 100 pages (or sides) to work with.

The charms include a glass bead, a music note, a bone bead and a leaf point.
The trim on this one is a charm on plumbing chain and it includes a musical note. The open edge has many colorful tabs, file folders, and ribbons as page markers. You can write on the tabs to identify sections of this book.

The mix of materials include papers, file folders, book pages, and marketing materials.
Most of the pages in this Anything Book are full size, but there are a few places with layering. In the photo above, the pineapple is part of a file folder cut down as an overlay over a brown cardstock page. On the reverse side, the file folder has a green leaf scroll patterns.

There are recycled reply cards, a return mail envelope and this air mail envelope waiting to hold treasures.

 This delightful Anything Book contains a wide range of patterns papers, cardstock, book pages, and marketing materials linked together by color. Under the air mail envelope in the photo above is a page from a foreign language book. You can see the variety of tabs along the edges on both sides.

A page decorated with a stamp and overlaid with a product tag.
Each two-page spread is color coordinated to give you a beautiful backdrop to add your words, found items, photographs, and memories. Each turn of the page reveals yet another striking combination of fun and inspiring materials waiting to hold your treasures.

Found items like calendars, greeting cards, and playing cards get a new life in this Anything Book.

The Heartstrings Anything Book takes its name from an item inside the book. I'll let you discover the item on your own. Its pages are embellished with washi tape, postage stamps, paper remnants, business cards, and clips to give it a unique look.

The unique bar code identifier and name make this one-of-a-kind journal even more special.
 Like all of my Anything Books, Heartstrings is signed by me and has a bar code with it's unique identification code. It also comes with a book belt, a lime green rubber band that holds the pages closed and keeps your treasures safe.

Tabs make it easy for you to jump right to the section you want. Write on them for easy access to your memories.


You can add your own words with the ultra-fine tip permanent marker included with this Anything Book. I'll also send you an archival quality glue stick so you can add in your own found items, photographs, and even the menu from your favorite restaurant.

A glimpse at the range of materials and colors waiting for you inside the Heartstrings Anything Book.


Because of the book ring binding, you can insert your own pages. Simply open the rings and take out a page for a template. Use a standard hole punch to add holes to your treasure, and insert it into Heartstrings where you want it. If you book starts to get too bulky, you can upsize the book rings to 1 1/4 or 1 1/2 inch book rings which you can find at most office supply stores or in the office supplies section of discount and department stores.

Check out my Etsy shop for the Heartstrings Anything Book and others like it. They make wonderful gifts.

Friday, April 10, 2009

More Crazy Ideas

I'm having a lot of fun leaving these art pieces the places I visit. I've gotten used to having a collection of them in my bag, and when I run out, I feel compelled to return to the studio to make more.

I'm experimenting with different color palates and designs, still keeping the "trust your crazy ideas..." stamp as the common element.

This round, I'm adding a collage element. I pulled out some British stamps and I'm adding them on the front. I'm considering switching from the Distress Inks to acrylic paint that I'll brayer on for an uneven application. I almost did that this time, but I didn't feel I had enough time to experiment with the design for that today.

I'm going to take them out with me tonight! So watch out, Phoenix, you might find a piece of art tonight where you least expect it.

Thursday, December 18, 2008

Holiday Gift Tags


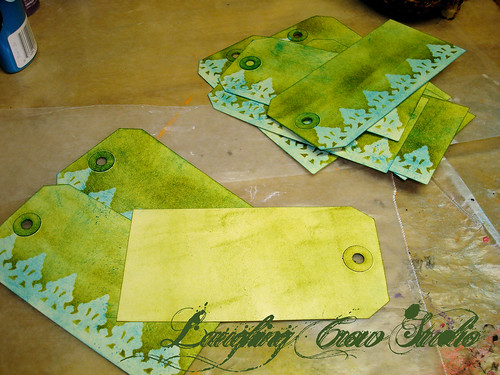
I'm so excited to share these with you! These are my holiday gift tags this year. I normally make nice tags, but I decided to go all out this year. This is my first holidays with my studio, and it is the best present I have ever given myself! Here's some of the back story on how I made these tags.

[Ooopps. I guess Jamie and Tyson now know they are getting something from me! Maybe I should have posted a spoiler alert.]

First, I pulled out everything I could think of related to a holiday theme from my stamp collection. I ended up going with a star theme because I have a nice star quote stamp. It speaks to the holidays without specifically being about Christmas or any specific holiday.

Then, I spent about an hour designing and mocking up a tag. I focused on placement and layout, and once I had it the way I liked it, I started thinking about the colors. My inspiration for the colors was a ball of recycled silk yarn from Tibet. I love this stuff, and want to use it where it has a big impact. I pulled colors from this to select which of my Tim Holtz Distress inks I would use. Because I love green and all shades of blue-green, that's my main color. The red really contrasts nicely with the coolness of the blues and greens. I wasn't thinking Christmas when I picked this scheme, but it works.


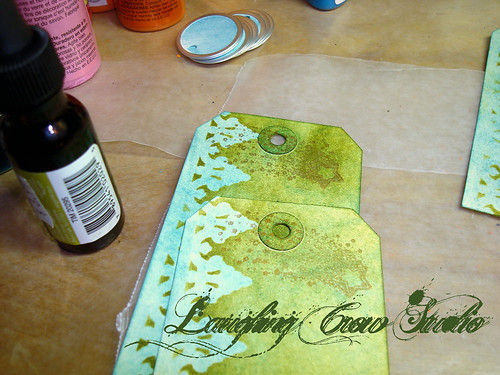
I started by using the applicator to put a background coat of Broken China (blue) on each tag. Next, I used one of the Tim Holtz masks along the left border and applied a coat of Peeled Paint (green) with the applicator. I turned each card over and lightly covered the back. I really hate raw surfaces in my projects.

As you can see, I went through a learning curve with the ink and applicator. After a few tags, I figured out that rubbing the applicator over the ink pad and then rubbing it over the tag gives the best color coat without applicator sized blotches. That's what I love about my art right now, I'm starting to master tools because I'm using them more often.


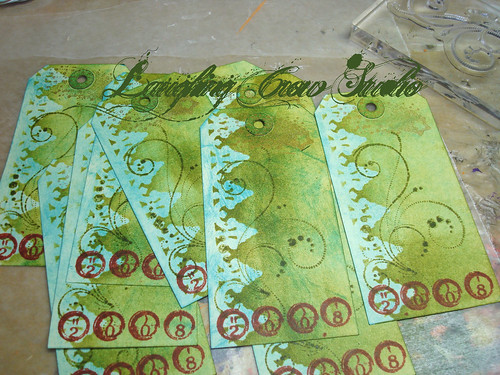
I added a shooting star stamp across the top of the tag over the hole. I tried using silver because I thought it would go nicely with the aluminum ring around the circle tag, but in the end, I went with copper. The copper blends into the background colors and I liked that look better than the shiny look of the silver.


I started adding content from the bottom, starting with the year. I love the way this Fired Brick red contrasts with the cool blue green background.


While playing around with the prototype, I decided that I wanted some sort of scrolling image in the middle of the tag, but subtle so it doesn't make it hard to read the quote. I tried several scrolls, but ended up with this one because it is light handed. I used the Pine Needles ink for this, which is more of an olive, yellow green. I love using adjacent colors on the color wheel like this because I love the richness it adds to the palette.


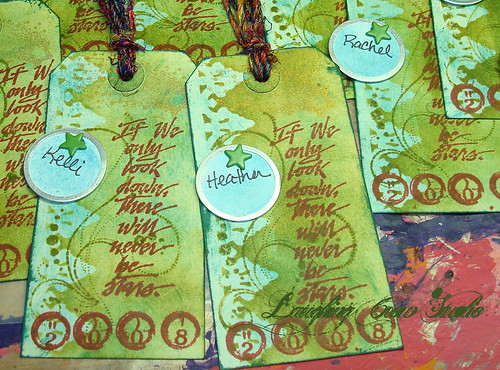
I used the Fired Brick again on the quote to make this the most prominent part of the design. It took a bit to figure out the placement for the stamp so I had the words in the best location. It was fun watching them suddenly appear nearly finished on the table.


I finished up the inking by using Pine Needles on the edges and doing a bit of distressing on top and bottom. I love the distressed grunge feel it gives. I wrote the recipient names on the circle tags, and using a paper piercers, I punched a hole and inserted a star brad to attach the circle tag to the gift tag. I noticed that the circle repeats the scrolling design underneath, and love the way it lines up with the scrolls. I wish I could say I planned that, but in truth, it was a happy accident.

I cut the yarn and attached them to the tags. They are so pretty I keep one near me when I'm at the computer just to cheer me up!

More pictures on Flickr.

Monday, November 10, 2008

Six Random Things

Brent Logan tagged me, so here is my response according to the following official rules:

  • Link to the person who tagged you.
  • Post the rules on your blog.
  • Write 6 random things about yourself.
  • Tag 6-ish people at the end of your post.
  • Let each person know he/she has been tagged.
  • Let the tagger know when your entry is up.

Here are six random facts about me you can't learn in my Facebook profile:

  1. The first album I bought for myself was Simon & Garfunkel's Bridge Over Troubled Water. I still love that album, and can still play that song on the piano (at least I could the last time I sat at a piano).
  2. When I was a kid, I took piano lessons. In junior high, I decided I wanted to become a concert pianist and asked my teacher to pile it on. In the next year, we discovered that not only do I have small hands (a hindrance for piano playing), but every finger is double jointed, making them weak. My pitch isn't perfect, and I can't play well by ear (apparently those things go together). She told me I could make a living as a concert pianist, but I would never be great. I made my first career change in that moment. I wanted to do something where I could be great. I never took another piano lesson, either.
  3. In high school, I was selected to complete a senior honors art program through a competitive selection process. I designed a project in textile arts to learn to weave and design fabric. But when it came time to sign my registration, my mother insisted that no girl should graduate from high school who couldn't type and take shorthand (I graduated in 1977, and she was stuck in 1957). After a heated battle that I lost, I dropped chemistry and the honors art program to take them. Typing turned out to be a great idea. Shorthand... not so much.
  4. I was in the first audience to see Steven Spielberg's Close Encounters of The Third Kind on the day it opened. I saw it more than 20 times in the theatre. Back in the day, you were either a Star Wars person or a Close Encounters person. I didn't find my inner Jedi geek until they re-released Star Wars a few months before Empire Strikes Back.
  5. My dad (who didn't protect me from the typing and shorthand fiasco), was a somewhat famous research physicist who worked in solid state physics. His team did the fundamental science research that led to the development of solar batteries in the early 1960s, among other things, at Wright Patterson Air Force Base. Most of his work was directly for NASA and he loved astronomy. I have fond memories of him showing me the heavens from the telescope in our backyard in Ohio when I was very young. I've been a backyard astronomer ever since. After I moved to Arizona, I bought a telescope and he got to see the stars under the Arizona dark skies.
  6. After a stint as a consultant who flew to work every other week, I decided to use my frequent flyer miles to visit Australia. When that ticket fell through at the last minute, I took the three weeks off work and traveled through Arizona and New Mexico without an itinerary. I spent a week with the Hopi and was deeply moved by my time on Second Mesa and Third Mesa. It was the first time I had more time off work than a week and two weekends, and during this time I decided to go into business for myself. I came back to my routine with a new objective and passion, and started my company 9 months later. I've never looked back, and it's been 13 years.

I'm tagging the following people:

I can't wait to see what I learn about your backstories!

Sunday, July 20, 2008

Lightening Strikes

I'm so excited that I have to post again here. I've just spent the first part of my evening reviewing a travel guide to make a list of the places to see, shops, and restaurants I want to visit on my trip. Unable to sleep (that's another story), I began mapping out form I could make to organize and record that basics for these destinations that would allow me to journal about them and add photos later (for the ones I really visit). I had the idea of printing a basic information collection form on tags that would allow me the room to hand write my notes, bind them with a book ring, and then pull them out when I arrive.

The tag idea had two limitations. First, the tags I was imagining were too small for the generous envelopes that make up the honeycomb book. The ribbons will hold loose items, but only if they approximately fit the slots. Second, the tags didn't have enough room to paste in the info from the travel guide and a photo. So I was rethinking what I wanted.

Then I had a brain storm and lightening struck!

I just spent the last 2 hours designing three forms (restaurants, shops, galleries/parks) that organize the relevant information about each. The restaurant form even collects information about which meals they serve and recommendations of must-try menu items. They all collect information about what I would do differently if I returned in the future as part of the journaling.

I've just printed out the drafts, and after I make some tweeks, I'll be printing out multiple copies of each form on plain cardstock, distressing the edges, punching a binding hole, and slipping them into one of the honeycombs. I'll spend some time with the travel guide before I leave to fill them out.

I'm so excited to have a challenge and find a solution in time to take the journal with me on the trip! Now that lightening has struck, maybe I can win the lottery, too.

Sunday, May 4, 2008

Project: Gibraltar Travel Journal

In my studio time last night, I nearly finished my Gibralter travel journal. This project started from a Rusty Pickle kit in the class taught by Lance (Got Pickle?) Anderson at the Paper Vineyard last month. It had a travel theme, and because a Gibraltar trip was my first really well researched trip, it seemed a likely combination. The kit and the resulting accordian envelope with tags book is adorable, and I haven't strayed from its design. I've just updated it with my photos and ephemera and experimented with some tools and techniques.

Gibraltar Travel Journal - Catalan Bay tagThe Catalan Bay tag fell together nicely and I love this composition. The photo is the Caleta Hotel in Catalan Bay. I filled in the blank spots of the photo with the title and an old postage stamp that includes an image of Catalan bay. I love the way these details pull your eye around the entire tag.

Here are a few of the customized tags. Again, the basic tag features and design come straight from the kit. My apologies for the images. My digital camera died and I haven't replaced it yet. These are scans, and they lack some detail.


View from Cable Car tag
Gibraltar Travel Journal - Landport Tunnel to Spain tag
I used Tim Holtz Distress Inks in Vintage Photo to age this one. It's a fun look, and the photo now matches the vintage look of the journal. I didn't use it on the landscape images because I didn't want to obscure the views.

I'm still working out the technique I'm using for the page titles. I used the same technique in Words To Live By and had better results on plain paper. I'm experimenting with various paper weights and other options.